Thursday, September 30, 2010

Thursday 9/30/10

part one of the lab
part two of the lab

data collected from lab completed in class


Today in class, we were given six sheets, two for the lab we did in class, the other four we didn't get to yet.

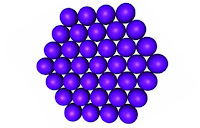
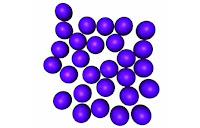
The lab todaywas the Rutherford Simulation Lab, in the lab we took a piece af paper with six circles on it, and six small squares at the center of each circle. We layed a piece of carbon paper on top, and with a partner, bounced a marble on top of the paper 110-120 times. After we finished, we counted the number of dots: in the circles, in the squares, and out side of the circles.


Using the collected information we found various data, like the percentage of dots that landed in the circles, for example me and my partner got 69 dots in the circle, out of 120 dots. to get the percent divide the number dots in the circle to the number of total dots: 69/120=.575 or 57.5%.

then using the total area of the paper, 93.5in. sq., and the percent of dots that landed in the circle, we found an estimated area of all 6 circles. We did this by multiplying the area of the paper times the percentage in decimal form: 93.5*.575=53.76in. sq.


Using the information we just found, we divided by six to find the next question, which was, what is the area of one circle: 53.76/6=8.96in. sq.


Then we solved to find the radius. To do this divide bothe sides by pi, then the square of your answer. To solve for diameter, multiply the answer you just got by 2. 8.96/3.14159=2.85 then the square of 2.85= 1.689in is your radius. 1.689*2= 3.378in is your diameter.


For problem 7, use a similar process to find the area of a square, like finding the area of a circle. First divide the number of dots in the squares by 120, i got 2/120=1.56, then divided by 6 to get one squarer alone. 1.56/6=.259in. sq.


to find the length of a side, take the square root of the area of one square.


Question Answers:


What does the paper represent?

the gold foil


What does the circle represent?

the atom

What does the marble represent?

the alpha-particle


What does the square represent?

the nucleus of the atom


The true diameter of each circle is 3.2 inches. find your percent error. to do this subtract your value minus the true value, then divide by the true value, and multiply by 100.


>>> (3.378)-(3.2)=.178/3.2=.055625*100=5.5625%


What could account for your own error in this lab?


>>>answers may differ. ex: not enough data collected.


Homework: Finish Question Four of the Lab, Test next Friday, October 8th, 2010


Next Scriber: Lauren


Wednesday, September 29, 2010

Wednesday 9/29/10

Modern View-electrons can be in ground or excited states and can jump between levels. When electrons drop levels (high to low) they give of a beam of light! Its like bees in a beehive and bees are electrons moving around the nucleus like a cloud. Similar to the picture above
Niel Bohr from 1914 discovered that electons(-charge) "ORBIT" around positive nucleus in different- ORBITALS(levels). Electrons can jump up and down these levels. As seen above.

Rutherford discovered all atoms have tiny positive centers(nucleus).
Ernest Rutherford from the early 1900's shot alpha particles(+ charge) through gold foil as shown in the picture above. Most of them went through but some deflected and these some were - charged particles!

Joseph John Thomson or J.J. from 1897 studied cathode ray tubes. He would excite the gas in the tubes with electricity. He would hold a magnet to the sides of the tube noticing a bend in the light (+ side attracted beam, - side repelled beam). He discovered that atoms must have a negative(-) charge and if that, then with overall neutrality, they must also have a positive(+) charge. This is demonstrated in his model above.John Dalton was an english schoolteacher from the early 1800's. He thought that each element was mad of elements, an atom of one element would be identicle to an atom of the same element. Also atoms do not include the existence of the nucleus, dosen't explain the existence of ions or isotopes, and dose not talk about subatomic particles (electrons, protons, and neutrons). His view of the atom looked something like the picture above.

Today we started off class by finishing the notes from yesterday on the Atomic scientists (Dalton, Rutherford, Thomson, and Bohr). You may look at yesterdays scribe for what they look like and foe more help.

After that Mr. Paek gave a lecture on the four scientists, their major contributions, what they discovered about the atom, and their actomic model. As shown above^ NOTE: start from the bottom picture and read up!!
no homework! lab test due by next friday!
Next Scriber: Maddy M.

Tuesday, September 28, 2010

Tuesday 9/28/10

Black container that contained the bead. There were 12 different containers with differents line patterns inside of them.
(scroll down all the way for more details)

Black box lab

We did this sheet in class. The sheet had four atom scientists' names and we had to fill out information about them. The information can be found on the colored sheets pictured below.

These are the colored sheets of paper with the information on  four atomic scientists. (Dalton, Rutherford, Thomson, Bohr)

2nd part of the black box lab
Today in class, we started a new unit. We began studying the atomic theory. We did the Black Box Lab. In this lab, we had to go to several stations with black circular containers. Each container had a bead inside of it. We would rattle and move the container to determine what type of shapes/lines were inside of the canister. We could determine the shapes by feeling how the bead bounced off the surfaces, and how the bead sounded when it bounced off certain spots of the container. We weren't allowed to open up the container to see the shapes.Then, we would sketch what we guessed was in the container, on our lab sheet. It was sort of like the concept of trying to figure out what atoms looked like, back in the days of Dalton, Rutherford, Thomson and Bohr, who were atomic scientists.

We got four colored pieces of paper with information about 4 different atomic scientists. The information on the sheets of paper can be used to fill out the Atomic Scientists worksheet that we got to do in class.

Next Scriber: Grace Ridge

No homework. Test next Friday, October 8th, 2010

Monday, September 27, 2010

9.27.10

Today in class we did not do anything complicated. It was an easy day and we reviewed the test that we took last Thursday. We also talked about the lab test that we took last Wednesday.

First of all, we started off by getting our journals back from Mr. Paek. He was supposed to check them in for points, but he did not yet because he was a bit too busy. To get an A for the journals just make sure the pages don't fall out and that they should be in a similar order to Mr. Paek's journal. We also got four new pages for our journal for unit two. (The new pages are shown at the bottom.) Please leave a blank page after the first two pages to have a page titled, "Text Questions." He also crossed out the names of people who were scribers, so if you were a scriber already, make sure you tell Mr. Paek.
Afterwards, Mr. Paek said that there were good news and bad news. The bad news was that the class did not do a good job on the lab test. Since our class did poorly, he is giving us an opportunity to get half the points back from the lab. In order to get the points back you can go see Mr. Paek during 5th period, 6th period, before school, or after school to work on a worksheet based on the lab test. You have one week to get points back from the lab test, so the option to do the lab worksheet is open until next Monday October 4th. The good news is that the test results were great! We got back our tests today and went over a few problems. After getting back our test, we also got a grade report. As a reminder, remember that labs/projects are worth 20% and tests/quizzes are worth 50% of your chemistry grade.


--The four new pages:


This is all what we did during class today. If you have any questions make sure to ask Mr. Paek. Also, don't forget to get the four new journal pages! There is no homework tonight!

-Next scriber: Alyssa P.
****When you're done with writing your own scribe post, please write the name of the next scriber that you choose.

Sunday, September 19, 2010

The Scribe List

This is The Scribe List. Every possible scribe in our class is listed here. This list will be updated every day. If you see someone's name crossed off on this list then you CANNOT choose them as the scribe for the next class.

This post can be quickly accessed from the [Links] list over there on the right hand sidebar. Check here before you choose a scribe for tomorrow's class when it is your turn to do so.

IMPORTANT: Make sure you label all your Scribeposts properly (Your display name, unit title, scribepost, and p1chem2010) or they will not be counted.

Michael            Lauren          Danny          Jennifer               Erika          Ross          Nik          Sal           Lia          Heather          Seena         Gennah          Dan          Cyril          Maddy           Emily          Alyssa          Josh          Grace          Michelle          Brandon         Tima          Petrina          Peter

Saturday, September 18, 2010

Friday September 17, 2010

Today in chem we did a lab titled "Matter Lab Stations", learned about diatomic molecules, and completed a chapter 1&2 review sheet. For the lab, all of the tables had models of molecules and atoms made of different colored balls (pictured below). We went around all 6 tables, and completed a sheet that required us to draw a picture, write a formula, and list all the terms that applied.

The terms we used were;
Atom, Molecule, Pure substance, Mixture, Compound, and element.
We were told that;
yellow-Hydrogen
black-Carbon
red-we could choose any element, but the majority of the class chose Oxygen.
When we finished Mr. Paek went over it with the whole class.


Diatomic Molecules
After we went over the lab Mr. Paek told us about Diatomic Molecules. The definition we got was: these elements will always be paired when by itself. In other words, when you see one of these elements it will always have a subscript of 2 when it is by itself, i.e. cannot be just one atom, it must be a molecule.
The diatomic molecules are
H-hydrogen
O-oxygen
N-nitrogen
Cl-chlorine
Br-bromine
I-iodine
F-fluorine
Another way to remember these is by combining them to make a word 'honclbrif' pronounced hohn-cul-brif.
Review
The review sheet included:
density
conversion factors
molecules, atoms, compounds, elements
chemical and physical changes
states of matter
metric estimations
All of these will be included on the quiz on Monday, and the test on Thursday. There is a lab quiz on Wednesday also. Dont forget: the web assigns are due on Monday!

Thursday, September 16, 2010

ScribePost Format

Title:  day and date - for example - 11.13.10

Announcements - put any here

Homework -  put any here

Body:  this is solely up to you how you do this.  please remember, you don't do many of these - do yours the best that you can - for yourself and for your classmates.  Headings in bold, pictures, videos, examples, announcements, homework are some of the elements that make for a successful post.

End with a pick of who the next scriber will be.

Labels: Need 4 of them:
  1. your display name
  2. unit name
  3. scribepost
  4. p1chem2010

Thursday Sept. 16 2010

Today in class, we learned about the differences between physical and chemical changes. We learned that for it to be a physical change, the change should not affect the chemical compostition and that the same chemicals and arrangement of atoms would be present. As for a chemical change, the change alters chemical composition where as new chemicals form, the bonds would be broken and formed and the atoms would be rearranged.


A few examples of this would be:

  • Snow turning into water - Physical Change
  • Grilling a steak - Chemical Change
  • Persperation evaporating - Physical Change
  • Phosphorous burning - Chemical Change


We also did a lab by going around each table and observing the changes at each station. There, we had to decide whether or not the change was physical or chemical by our observations.


Just A Reminder:

  • Quiz on Monday (There will be some review questions. Ex: Density)

  • Review on Tuesday

  • Lab Test on Wednesday

  • TEST on Thursday

Thursday 9.9.10

Today, our class went over the quiz about measurement and sig fig rules. Everybody messed up on the last part of the quiz so we got to retake it. We then completed the Density Lab that was unfinished from yesterday. We learned that the density of a regular solid and irregular solid. To get the density of a regular solid, you must first measure the mass of the solid using a scale. Second, you must measure the length, width, and height of the object using a ruler. Lastly, you take mass and divide it by the volume to get the density of that object. To get the density of an irregular solid, you must first measure the mass of the object using a scale (as you did for the regular solid) and record it. Second, you have to fill a 100 ml graduated cylinder half full of water and record the volume of water in the cylinder. Third, you gently place the object in the graduated cylinder. Fourth, you subtract the volume of the water and the object from the original volume of the water. Once you get your answer, you then divide the mass from the number you got and get the density of the object. The last thing we had to do sounds complicated but actually has nothing much to it at all. We had to figure out the density of a liquid. To do that, you have to first measure the mass of an empty 100 ml graduated cylinder. Second, fill the cylinder about 1/3 full. Third, measure the mass of the cylinder plus the liquid. Fourth, read the volume of the liquid in the cylinder. Fifth, subtract the mass of the cylinder and the liquid from the original volume of the liquid. Lastly, calculate the mass over the volume to get the density of the liquid.

Our class then learned all about unit conversion and dimensional analysis. We learned how to convert centimeters into yards, tons into kilograms, years to seconds, etc. Although this may seem like a lot of math, Mr. Paek showed us an easier way to figure out the problems other than taking the longer way, which consisted of much more effort. The easy way is to start by Writing out the units that you are given as a fraction. Second, you write out the units that you want at the end of the conversion as a fraction. Third, you determine the appropriate conversion factors such as yards, feet, inches, tons, miles, liters, seconds, etc. Finally, you evaluate the appropriate arrangement for conversion factors. That is, copy the conversion factors from step 3 into fraction form so that the units end up canceling. Remember that when you multiply fractions, you can cancel units only when they appear in the numerator of one fraction and the denominator of another. If you don’t get it at first, don’t get angry with yourself as it nearly just takes practice.
During the end of class, Mr. Paek showed us an experiment for all our hard work from unit conversion that literally was flaming. He showed us an example of density by taking a liquidly soap substance and making it into a bubble filled with a gas that was clearly flammable. The point of this experiment was to show that if the density of a gas were less than that of air, it would float. As Mr. Paek chose some volunteers to hold the bubble dispenser, which you had to keep shaking for the bubbles to come out, he then took a meter stick that had a candle on it and lit it with a match. As the bubbles rose, he would touch them with the flame of the candle and they would burst into flames. One time one of the bubbles actually flamed probably a little to close to the ceiling but nothing happened. Although the day was a lot of hard and complicated work, the period still turned out to be fun.

Wednesday, September 15, 2010

Wednesday 9.15.10

Today in class we were told there is a chance for extra credit. We can complete a TLC packet that review everything that we have been through step by step. Mr.Paek also introduced us to ChemThink. ChemThink is a website that gives us notes and quizzes us on material we go over in class. We learned about atoms and how they are different in different substances.
To Get To ChemThink:
1) Type in http://www.chemthink.com/ in the URL
2) Create account or login if you already created one.
To Create Account: First click "Register". Then create your account under this code. 8811-9253-2716. That will tell the computer your are in Mr. Paek's class. Then your username must have the first initial of your first name, and your last name. Your password can be anything you can remember.
3)Click "Introduction" and then "Particulate Nature"
4) Take Tutorial
5) Go through the question set.
(The question set requires you to get 10 answers correct before getting 3 answers incorrect.)

ChemThink goes over atoms and molecules. Also it goes over what the atoms and molecules look like in a solid, liquid, and gas.
Solid: Vibrating atoms that stay in their basic position.
Liquid: Atoms that are floating as if they were in water.
Gas: Atoms that are bouncing and flying everywhere under no control.


Solid Liquid


9.13.2010

Today Mr. Paek explained many things. He said that we could go to the TLC and get packets that take you step by step through all we have learned. He said that we would be rewarded with extra credit if we do the packets. We were also introduced to ChemThink.com. ChemThink lets us review on atoms and other things we are learning.


How to get in to ChemThink:

1) Type http://www.chemthink.com/ in the url

2) Login

Username: first initial in first name then last name.(ex. jsmith)

Password: Whatever you can remeber

Tuesday, September 14, 2010

Tuesday 9.14.10

Today, our class was shortened by 10 minutes because of the Fall Sports Assembly. We learned about a new topic, atoms, and were given four worksheets to tape in our composition notebook. We learned several new terms which relate to atoms, and were crucial in helping us do the problems on the worksheets. The terms are the following:

Atom: Most basic unit of matter (example: one atom of zinc)
Molecule: Group of atoms held together by a chemical bond
Element: Made up of a single type of atom (example: two atoms of zinc)
Compound: Molecule made up of more than one type of atom. If something is a compound, it is always a molecule.
Pure Substance: Made up of one type only
Mixture: Mixture of two types

It wasn't specified what these "types" are.

On the worksheets, we did numbers #1-9. Number 1 was defining the above terms. For number 2, we were given atomic level diagrams, and we were told to identify each as being either an element or a compound, and consisting of either atoms or molecules. For number 3, we had to answer the question: Can a substance that is a compound ever be made of individual atoms and not molecules? Explain. The answer was No, because compounds are always made up of molecules. For number 4, we had to answer the question: Can a substance that is an element ever be made of molecules and not individuals atoms? Explain. The answer was Yes, because an element can have two of the same atoms connected together.
For numbers 6 and 7, we were given a key to use. The key was three circles which were shaded differently. An unshaded circle was H, a striped circle was O and a shaded circle was C. For number 6, we had to write the formula for each of the following atomic level pictures. We learned that if two of the same atoms were bonded together, then the "2" was subscripted , not written in front of the letter. For example, two chemically bonded Hs would be "H2" , while two separate H atoms would be "2H".
For number 7, we were given the following formulas, and we had to draw a picture to match them. We used the same key that we used for number 6. For number 8, we were given pictures, and we had to write the formula and a description to match the picture. It's the opposite of what we had to do in number 7, but we also had to write a description. The description is basically a list of terms that appeared in the picture. The terms that we could use were atom, molecule, element, compound, pure substance and mixture.


The last page has numbers 9 through 13, but we were only told to go up to number 9. In number 6, we were given a formula, and had to draw a matching picture. In number 7, we were given a sample, and had to write the formula and description. Now, in number 9, we're given a formula, and have to draw a matching picture and description.
Homework: 5 webassigns due Monday the 20th.
You can get to the Webassigns by logging on to Moodle, clicking on Chemistry class, and clicking on "Webassigns, or you can go to webassign.net. To log in, your username is your ID number, the institution is glenbrooksouth.il, and your password is your ID number.

Monday, September 13, 2010

Monday 9.13.2010

Today in class Mr. Paek explained how the scribeposts for the past week were up and down. He explained that it would be best if each scribepost had paragraphs not just one long page of writing. Also he explained that the five webassigns for this unit are due September 20th, a Monday.


In class today Mr. Paek handed out a quiz. The quiz was twelve points and consisted of measuring a post it's sticky side, reading volume/other units. Having the correct sig figs in your final answer. Also density and unit conversions were on the quiz. After everyone completed the quiz we graded our own, because Mr.Paek trusts us. We ended up not going to the computer lab to work on our webassigns because we ran out of time. Possibility of going to the computer lab later in the week.


How to get to webassign:


  • Go to GBS homepage(http://www.glenbrook225.org/south)

  • Click on moodle and log in

  • Click Period 1 Chem-Paek

  • Click link to webassign

  • Log in(ID#) Institution(glenbrooksouth.il) Password(ID#)

OR You can simply go to http://www.webassign.net/

Click assignment to begin

Homework: 5 Webassigns due 9.20.10(Monday)

Friday, September 10, 2010

Friday 9.10.10

Today in class at the beginning Mr. Paek talked about our lab reports and how to add on to them. He also told us that if we didn't yet on the google apps documents for school share your report with him. After we did that we did some review with unit conversion problems. One of them for example was 350 cm to yards. To do this you have to cancel out cm by finding out how many cm in 1 m, which is 100. Then divide 350 cm by 100 and multiply it by the remaining 1. Next after we did a few problems like that, Mr. Paek told us about were going to start having most of our HW assignments online. To get to these you have to log onto your moodle account and on the main page there is a link that says Link to WebAssign. You then have to click on that and it takes you to the sign in page. Where it says username it is your id number, the institution is glenbrooksouth.il and the password is also your id number, you'll be able to change the password later. Last we went to the science lab to work on the web assignments.

Tuesday, September 7, 2010

Tuesday 9.7.10

Today, we started class with a lesson on how to find the volume and the density of an object. The density of an object is is its mass (in grams) divided by the objects volume. The objects volume can be found by measuring the length, width, and height, and then multiplying them together. We took notes on this lesson and recorded it in different hand outs.

An example of this formula is if the mass of a liquid is 35 grams and the volume is 7 mL, what is the density of the liquid?

The formula once again is D= 35 g/ 7 mL
You simply divide 35 by 7 and get 5 g/mL
We then started a lab to find the density and volume of a nail. We once again found the mass of the nail by weighing it and then using the displacement of water to help find the density. This method is done when an object is too small to be measured by a ruler. The object is dropped into a marked container filled with water, and the amount of water that is displaced is measured.


Friday, September 3, 2010

Friday 9.3.10


          Today in class Mr. Paek started the class by explaining how to reach the gapps website, which is, gapps.glenbrook225.org. At the website we can work on our lab reports or any papers with our partner at the same time, by clicking on the documents button on the top left, and choosing create new and scrolling down to document.
          Then we learned the sig fig rules for addition or subtraction, and multiplication or division. 
The rules for Addition or Subtraction are:- 

·         The answer must have the same number of digits after the decimal point as the measurement with the smallest number of digits after the decimal point. Example:- 135.2 – 24.075= 111.1 à The least number of number after the decimal were 1, so the answer must ONLY have one number after the decimal point.

The rules for Multiplication and Division are:-

·         The answer must have the same number of significant digits as the number with the least number of significant digits.
Example:- (48.0)(0.325)(1.02) = 15.9 à The least numbers of sig figs are 3, so the answer MUST only have 3 sig figs and numbers.

(There are other examples in the picture below)

          Finally, we started to learn about Metrics stating if statements are realistic. For example:- Is a basketball players 3 meters tall? The answer would be no, because 3 meters are higher than the ceiling.

Wednesday, September 1, 2010

Wednesday 9.1.10


Today, Mr. Paek started the class by talking about yesterdays scribe post. After going over what was good and what could’ve been changed, he let us go back to our chosen lab groups to finish up the measurement lab.
Most groups just had to measure the mass of four objects, and those objects were: a jumbo paperclip, a piece of paper, a pencil and an empty film canister. We used a balance pan to measure how much each object weighed in grams. Then, after measuring the mass, the last thing to do in the lab was to measure the temperature. We used a thermometer to measure the room temperature and the temperature of tap water in a beaker.
Once everyone finished the lab we regrouped and got four new sheets of paper to tape into our journal. Two of those sheets were about significant figures and the other two were about scientific notation.
The significant figures rules are:       
·         Digits other than zero are always significant
·         Zeros between non-zero digits are always significant
·         Any final zero use after a decimal point is significant
·         Zeros used solely for spacing the decimal point (place holders) are not significant
Examples are in the picture posted.
             Lastly, we ended the class by learning how to round numbers to four significant figures and how to convert measurements into scientific notation. To round numbers to four significant figures you take the first four significant figures and make the rest of the numbers after those zeros. For example 12,345,670 would become 12,350,000 or 0.0657030 would become .06570. Some people were really confused, but after doing a couple of examples we started to get it. Mr. Paek said that we will do some more examples in class tomorrow.


Tuesday 8.31.10

Today in class we started off by getting a diagram of the classroom. On it we had to label all of the safety features in our class. This included the exits, fire extinguisher, fire blanket, eye wash station, gas shut off, shower, and fume hood. We then went back to our seats and quickly identified lab equipment. These were things like, beakers, test tubes, graduated cylinders, Bunsen burners, funnels, thermometers, ring stands, and Erlenmeyer flasks (beakers that taper to a smaller opening). We then were introduced to measuring. We learned that you are only aloud to guess one number. This means you guess on what ever comes after the last known increment. For example: Lets say you have a pencil that is about 42 centimeters, and a ruler that goes up by tens. You would only know the first number which is 4 for 40, but because the ruler goes up by tens you would guess the second number, which would most likely be around 2. You could then say that you measured the pencil to be 42 centimeters after you put your two numbers together.We then did a lab which practiced measuring using different lab instruments. We had to figure out the smallest reading on the instruments, and then do exact measurements using them. We then measured volumes in graduated cylinders and beakers. After that we measured things like paper clips and humans with rulers and meter sticks.